I must admit I was a little nervous about tearing into my two True GDM-12 glass door refrigerators. Though, the process of modifying them and building the BrewPi’s was very rewarding and I am even more glad to have active fermentation going for a Dopplebock and Double IPA using the new BrewPi controllers. I love being able to be laying in bed and pull up the BrewPi management webpage and see what is happening or modify the fermentation profile. By By Johnson Controls, Hello BrewPi!
BrewPi is a fermentation temperature controller for brewing beer or wine. It runs on Raspberry Pi and an Arduino. Compared to other temperature controllers, BrewPi offers much better temperature control and a lot more features like data logging, a web interface and graphs. BrewPi is open source and has an active community. BrewPi developers are working hard to support mash control (BIAB, HERMS or RIMS) in the near future.
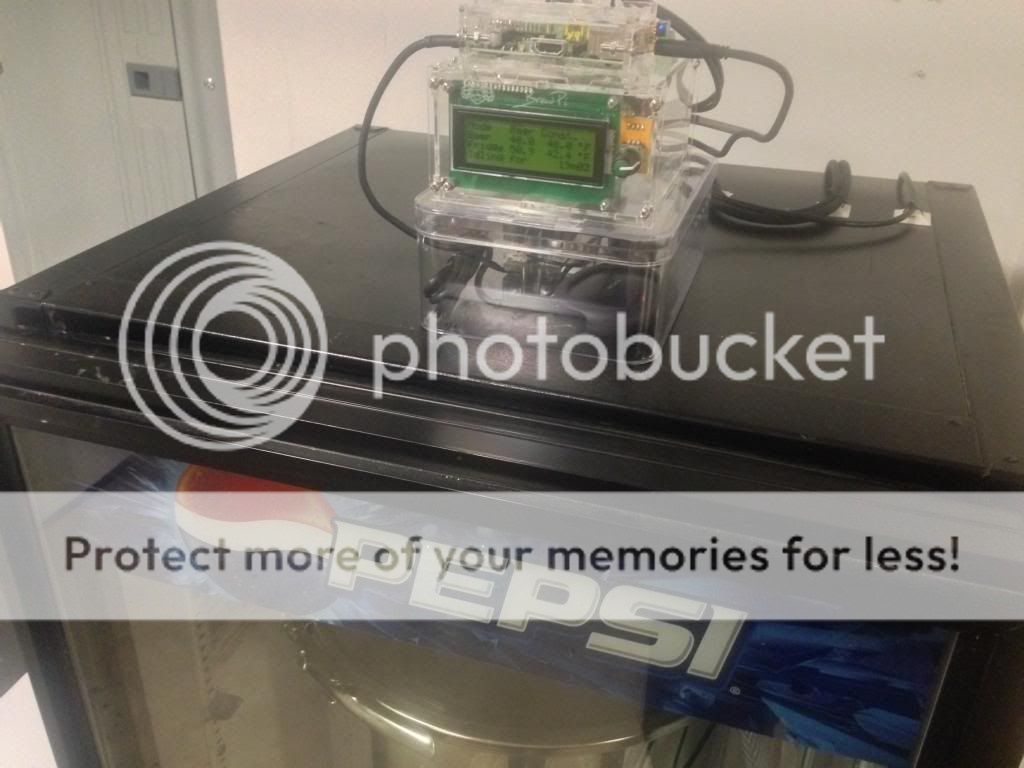
BrewPi runs on two very popular boards: a Raspberry Pi and an Arduino. The Raspberry Pi is a credit card sized computer that runs Linux. In BrewPi it runs the web server and a python script to log data and manage settings. The Arduino is a microcontroller board that reads the temperature sensors and activates the cooler, heater and other actuators. It also has an LCD and knob to display and change settings.
Stability and flexibility
The Arduino runs the temperature control algorithm autonomously. If you don’t care about data logging, it can control your beer without the Rasberry Pi. This makes this combo very stable: if the Raspberry Pi crashes, the Arduino will still keep your beer temperature perfectly under control. And being a simple embedded device, the Arduino just does not crash. If you want to run BrewPi on something else than a Raspberry Pi, you can! Any platform that has USB and can run a web server and Python will be able to run BrewPi.
Web interface
BrewPi runs a local web server that provides a great interface to change settings, view brewing data and to configure your controller. The web interface shows interactive graphs of your current brew and previous brews. You can easily start a new brew, view what the control algorithm is doing, check the logs, load/save temperature profiles, edit the active profile, etc.
An awesome setup. I shopped for some time to find a commercial fridge like what you have but couldn’t get within a few hundred dollars of an upright at Sears. So I did that. It sure would be nice to see the airlock/blow-off like you can.
I hear what you mean. Look at the builds people post in his forum. Makes more since when you see how others did it. His personal build requires messing the the fridge wiring, but you can go so many ways with what he has done.
He has also streamlined the install and setup from what I can see.
I plant to use powertails instead of wiring the solid state relays. Powertails are basically power supplies with a cord and an outlet along with the inputs that the brewpi would us to tell it to turn on. Way easier that way.
Yes. There are many ways to do it. Initially both refrigerators were connected to Johnson Controls which would control heating or cooling, but not both. The BrewPi handles both heating and cooling. Also to note in comparison, the BrewPi will hold the beer temperature within a 0.1°F. This is significantly different than the Johnson Control that will hold the beer temperature within a range of 2-4°F (or whatever differential you set it to). Because the BrewPi acts like a PID, it is capable of amazing temperature control. By setting up a beer profile within the BrewPi web management page, you can easily step up for a Diacetyl rest, make a slow step down for cold crashing, or do slow temperature steps if wanting the beer to self rise but not get out of control.
You are correct regarding the differential. Within the BrewPi, the minimum cool time is set to 5 mins and the max idle time is set to 5 mins. This setting is hardcoded into the software to protect the compressor. Of course, even with a 5 on 5 off setting, the compressor cycles a lot, but due to the thermal load of the conical/beer, especially on a large batch, the idle times can be pretty long. The compressor would be cycling more often during the most active part of the fermentation. For instance, my Dopplebock is currently set to 48°F, but due to the low end of the yeast temperature, the activity is steady but not spiking all the time. In this case, the compressor doesn’t come on that often.
The BrewPi developer ask me to post this on his behalf:
"Regarding the idle zones for the beer temp and cycling, in the BrewPi control algorithm there are a few things to prevent cycling and to protect the compressor:
There are hard coded minimum OFF times (5 minutes) and minimum ON times (3 minutes) to protect the compressor. These are not user configurable, on purpose.
For the fridge temperature, you can set the idle zone (upper and lower limit) in the web interface. The default is -1 and +1 degrees Celsius, compared to the fridge setting.
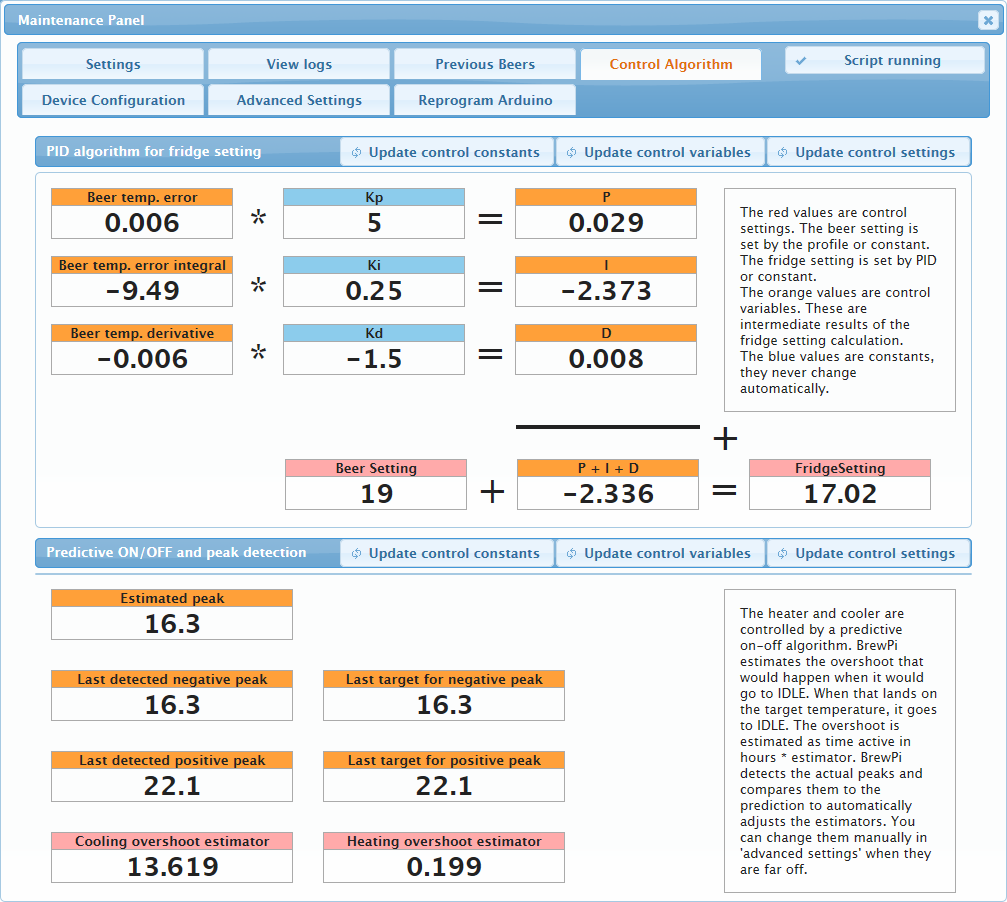
For the fridge temperature, BrewPi estimates the overshoot that will occur and turn off the compressor in advance.
The goal of course is to control beer temperature and not fridge temperature. So when BrewPi is set to ‘beer constant’ or ‘beer profile’ mode, it will adjust the fridge setting dynamically. To do this, it calculates the proportional, integral and derivative error in beer temp and adds these to the beer setting. The result is the fridge setting. You can adjust this calculation to match your setup. Please refer to this image: http://www.brewpi.com/wp-content/uploads/2014/01/control-algorithm.png
By controlling the fridge temperature to adjust the beer temperature, the beer temperature fluctuates a lot less. Here is an example where the beer is generating heat, so the fridge temperature is below the beer temperature constantly: BrewPi - Brewing Automation
I am working on a different way to calculate the derivative for the beer temperature, so the fridge setting will have less spikes. The spikes are caused by the digital sensor: when the least significant bit toggles it seems to rise quickly.
I just came across BrewPi via Google search…then came back to HBA to see if anyone else tackled this. The set-up in the chambers is insane! I’m really impressed and curious about setting up something small to work with since I’m still in my early brewing days.
I have around 0% knowledge of wiring, so would it be better to tackle the wiring of a compressor in, say, a small fridge versus buying a flex heating / cooling element and installing it into a fridge? At the bottom of the Fridge Hacking guide http://www.brewpi.com/fridge-hacking-guide/ they show some different options for heating elements which might be more beginner’s speed.
If you don’t feel like wiring, you can get relays that are prewired. Basically the prewpi hooks up to those via a control wire and all of the electrical wiring is inside. You would need two if you are going hot and cold and I think you can skip the relays.
It would be better to tackle the wiring of the compression/thermostat. Even if you don’t know much about wiring, it would be a good idea to physically see how the compressor is currently wired up in your refrigerator. Take lots of pictures before you cut anything as you discover wiring paths, from HOT to NEUTRAL to GROUND. You basically want to bypass your current thermostat and replace it with the cooling side / solid state relay of the BrewPi. I used paint can light bulb heaters in my BrewPi build to heat the chamber. This was connected to the heating side / solid state relay of the BrewPi. Cheers!
Here’s what happened the last time I tried to tackle any wiring - my wife and I were still living in Astoria, Queens. I wanted to install a new ceiling fan / lamp in the bedroom we were renting fro, popped the old light off and saw there were at least 9 different wires in the housing. After guessing on what to do I wired it up, turned on the switch and fried our building! Luckily later that evening the giant underground transformer on our block blew up and caught on fire, so I blamed it on that
I will take a stab at this and taking photos before I dig in is a killer suggestion, didn’t think of that before.
Anyone know where to get custom decals (for the top of the door) for a GDM-12 fridge like this?: BrewPi feature and review on AHA Pimp My System and in Linux Voice | BrewPi If you just remove the existing Pepsi/ True decals you’re staring at a fluorescent / LED (depending upon age) light, which isn’t nice either.
I REALLY want to remove the Pepsi logo and replace it with something custom, but I can’t get the Ones and Zeros guy to respond to where he got his…
Anyone know where you can get 3rd party after market casters for these True GDM12s? -The official casters for the fridge are like $280 from the manufacturer which is a level of crazy I never thought I’d see…


