I recently acquired a old 15.2 cu ft. Whirlpool freezer. Great condition and was FREE. Woop woop…lol.
Started to build collar this Sunday. And decided
To at least design it first. So I could have blue prints…
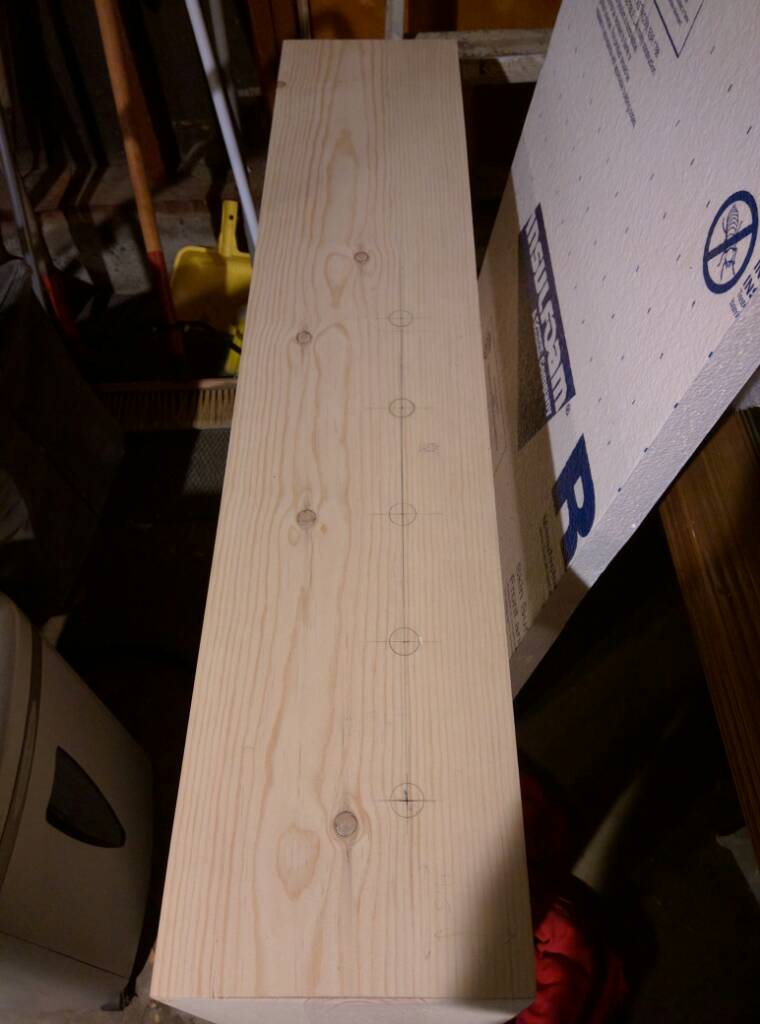
Wanted to figure out faucet spacing before I drilled anything and how to best construct the collar…
Maybe this can help someone who’s trying to figure it out…my design blue prints is not 100% complete but I wanted to post anyways…
Is their a preference for faucet location…center or opposite hump or same side…??? I’m thinking away from kegs…[/IMG]
The thought process I see most often for side mounted faucets is to the side with the hump to make loading kegs easier. I like centered faucets so much better, but I see the benefits of side mounted.
I recently acquired a old 15.2 cu ft. Whirlpool freezer. Great condition and was FREE. Woop woop…lol.
Started to build collar this Sunday. And decided
To at least design it first. So I could have blue prints…
Wanted to figure out faucet spacing before I drilled anything and how to best construct the collar…
Maybe this can help someone who’s trying to figure it out…my design blue prints is not 100% complete but I wanted to post anyways…
Is their a preference for faucet location…center or opposite hump or same side…??? I’m thinking away from kegs…
Drill a test hole first for the shanks in a spare piece of wood to ensure they fit. It will save you a lot of headache later, not that I would know. [emoji15]
Good idea :) the one thing that I’m really SALTY about is
The stock 1x10 wd…I cut nice mitered 45s but since the grade of the wood is not millwork type well it has have some minor bowing at the miters. Makes for a perfect alignment fit impossible… Argh!
I strapped the collar with a bix frame strap…will start form top, Screw w/#8 wd screws- pre pilot hole… then slide it down and continue…gonna glue 1st…
I’m thinking the 2x2 @ ea. Corner will help pull in the bowing as its not hard type wood…if I can’t get it to fit at least decently at the mitered corners I’m gonna karate kick it…lol
Guess why millwork quality wood cost $$$ vs $
But didn’t really want to spend $$$ on just a wd collar…
One call out I just thought of is to be sure the collar is tall enough to fit a 10lb steel tank on the hump. I think you will quickly tire of the 5lb tank and if you work off of exchanges, there is never a guarantee of an aluminum tank.
I sat a keg on the hump and it easily fit with room to spare…The hump i drew is not to scale in my drawing as this was more or less a schematic drawing for how i would design build this keezer
I’m mounting the faucets on the front approach side as per the schematic plans… I don’t like side mounting …to limited…
I built my collar so it would open with the collar and the lines would be out of the way when I was loading and unloading kegs. Kind of a pain to build the collar into the lid, but I like it.
I have 3 taps now. This was 2 1/2 years ago now…damn, time flies.
Revised Keezer Plans - drip pan, glassware and faucets revisions
30" sst drip tray that centers on faucets
moved the faucets/ shanks up 1/2"
To allow for Growler’s and big tall glassware
**trim/ 1x nailer w/ 1x10 shown as 2-1/2" ( incorrect) correct: 2-1/4" thick ( designed to cover the 1.5" Rigid Foam and allow for more surface are to use a wider sealant strip or seal :),
** Bottom of the wd. collar/ Foam assembly on this build is designed to work with my existing freezer seal and frame lip condition >>>modify your design to work with other condition’s as needed
showing common glass ware sizes for 16oz pint glass and Pilsner glass (sizes vary from mfr to mfr)
I practice public and private architecture and my job ;) Hence the plans…lol
I didn’t call out freezer dims as Equipment varies per mfr. Design/ fit to your own freezer
I’m going to paint my collar chalkboard black and when time allows paint the freezer a vintage enameled color; orange or creme or light blue or grey. Will look awesome with the black collar and chrome accents!
*program used: AutoCAD
I hope this helps others as this site and everyone here has helped me tremendously!!! 8)
I like that idea. More complex to design but the benefit of having the lines lift out of the way would be great!!
I’ll keep it in mind if I ever have to rebuild mine. All I need right now is the new temp controller I ordered last night. A power outage on Monday apparently fried my Ranco. Just permanently displays E2 now. 8^(
Love the drawings for the OP’s build. I never did master Autocad.
Bore in 7/8 shank holes; 6} cap holes I’m not using do to only having 4 faucets at moment. with shanks - perlick SST faucets and creamer and SST 4" with 1/4 Bore holes
finish sanding and the exterior
prime entire collar inside and outside (seal against moisture)
light do a finish sanding on exterior only
*cut & attach 1.5" rigid insulation brd. to the interior of the collar for insulation
paint exterior face chalkboard black
apply sealent adhesive sealant foam strip to top of collar between lid and collar
*apply sealant adhesive between body and collar
freaking finally have a keg draft system!!![emoji481]
Will update as I progress to help others in their build…
Oh as far as hinges go…those are self explanatory… But I’m thinking of using strong magnets counter sunk into top of collar to make a nice pressure seal…
That way lid is closed without using a latch!
Just idea…at moment as I’m trying to build this as cheap as possible but with some decent thought and quality… Guess I don’t want to spend 3 billion on a collar build for free freezer that is not new…lol hopefully this helps others do it cost effectively…